Tips on Taking Photographs in Antarctica
Photography is a skill, like other skills such as tap dancing, needlepoint, and being a Jedi Master it requires practice and effort to get good at it. As you get good at it you will have a valuable skill that will repay you with a wonderful picture record of your life and travels.
Practice Makes Perfect
Practice before you go and learn how to use your camera especially if it is new to you. You will be taking pictures of wildlife and landscapes, so practice on these if possible, pets make a good substitute for wildlife as the difference between an ok photograph and a great one is timing, position and lighting, not just subject. If you go to Antarctica and the only times you've picked up a camera previously was for a selfie, the pictures probably won't be so hot. Your time in Antarctica is limited, make sure you know how to operate your camera from the outset.
 Antarctica
Not Antarctica - just
practising
Look at your photos and assess them critically. Why are the good ones good? Why aren't the so-so ones better? what you could change about them? Show them to some-one else and get their opinion too (but beware that they don't just react to the subject). I sometimes find that the pictures that I take that I am most pleased with get a "yeah it's ok" response whereas some I think are just ok are the ones that others enthuse about. The most difficult pictures to get aren't always the best.
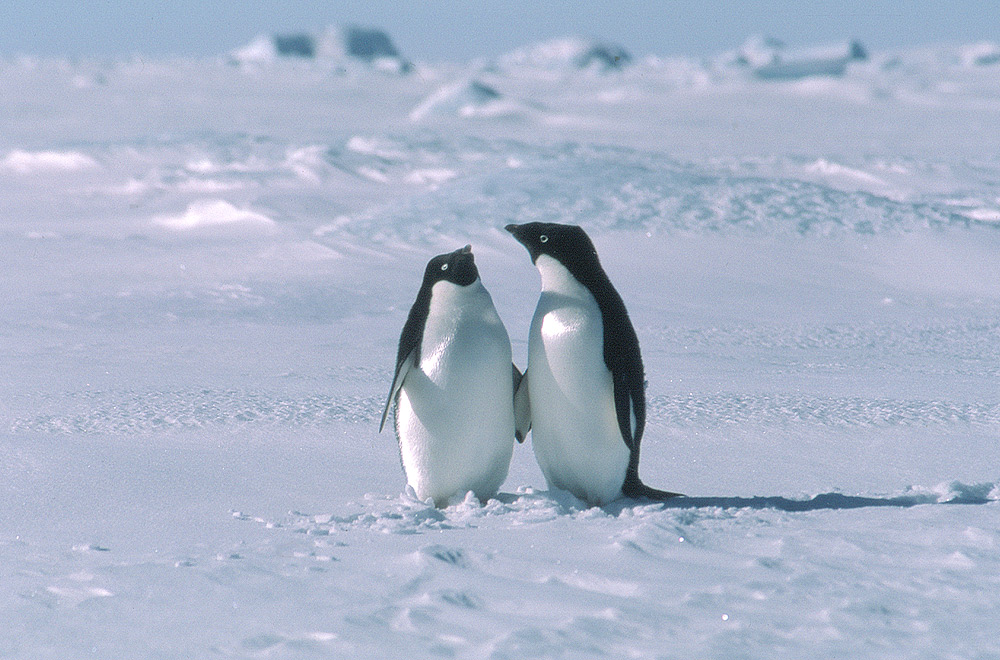
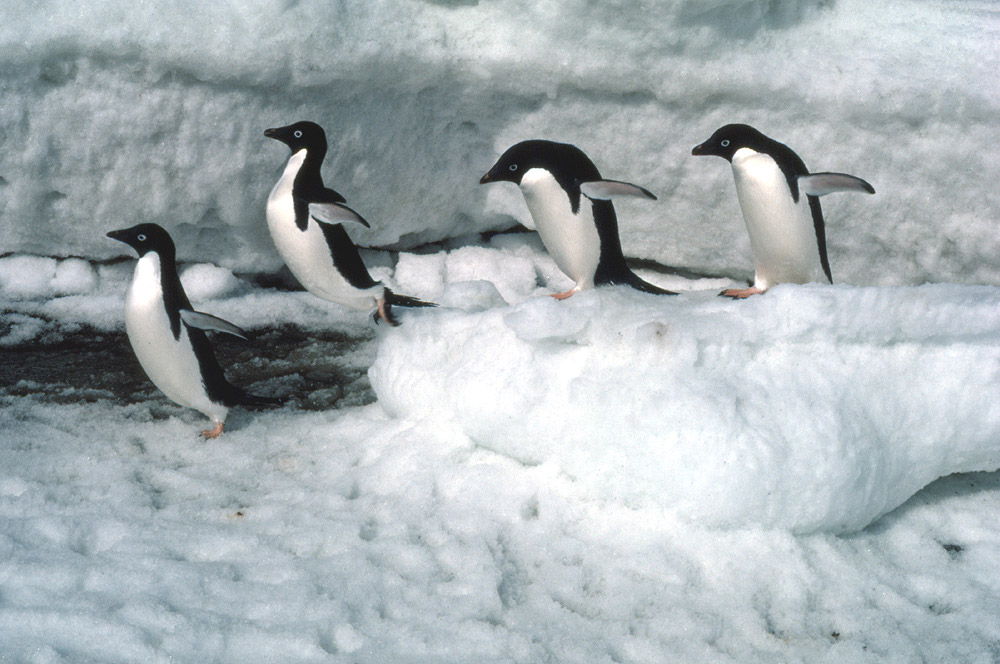
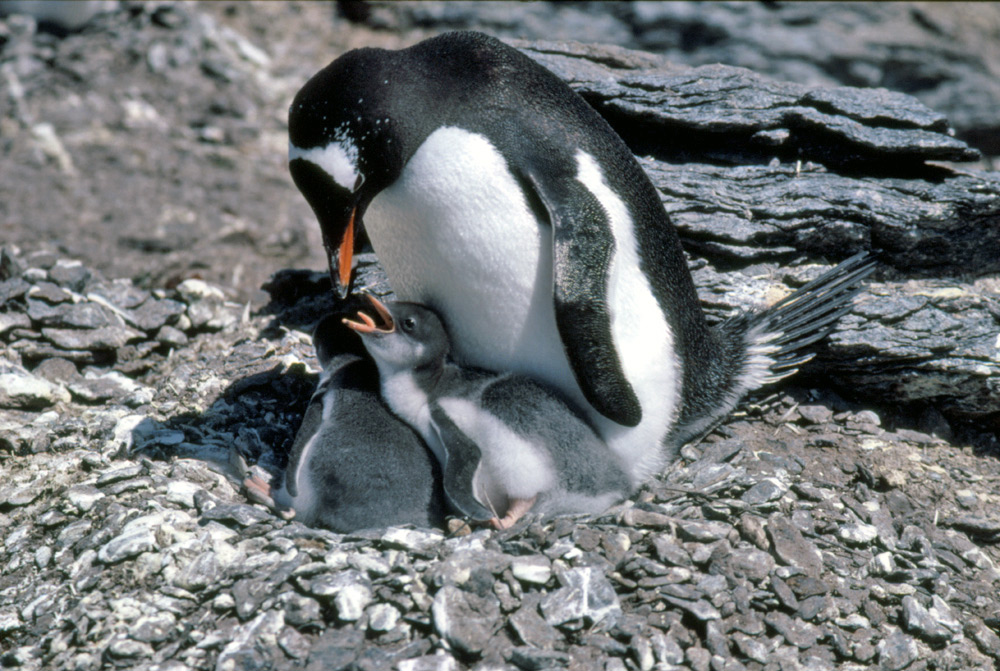
Being on the Right Level - Penguins and Seals
Most animals you will photograph, penguins and seals (and pets) are much lower than you are. You should get down to their level when taking pictures, otherwise you get a picture that implies you are outside of their world gazing in, rather than being a part of it (the same applies for small children). So squat, kneel or crouch down to get to the same level as your subject.
Walking towards a penguin or seal may well alarm them as you are higher than they, in the case of seals, they often threaten each other by rearing up to gain height, an upright human is a similar threat, so stay low. Look where the sun is and position yourself so that the animals is not in shadow and sit near using your lens to get closer, watch what they do for a while, look around and see what else is going on. The key is to take your time and look for the best picture opportunity. While you're there think about the wider shots, put the animal in context in their environment while you're waiting for them to do something photogenic, if things don't fall into place try somewhere else nearby.
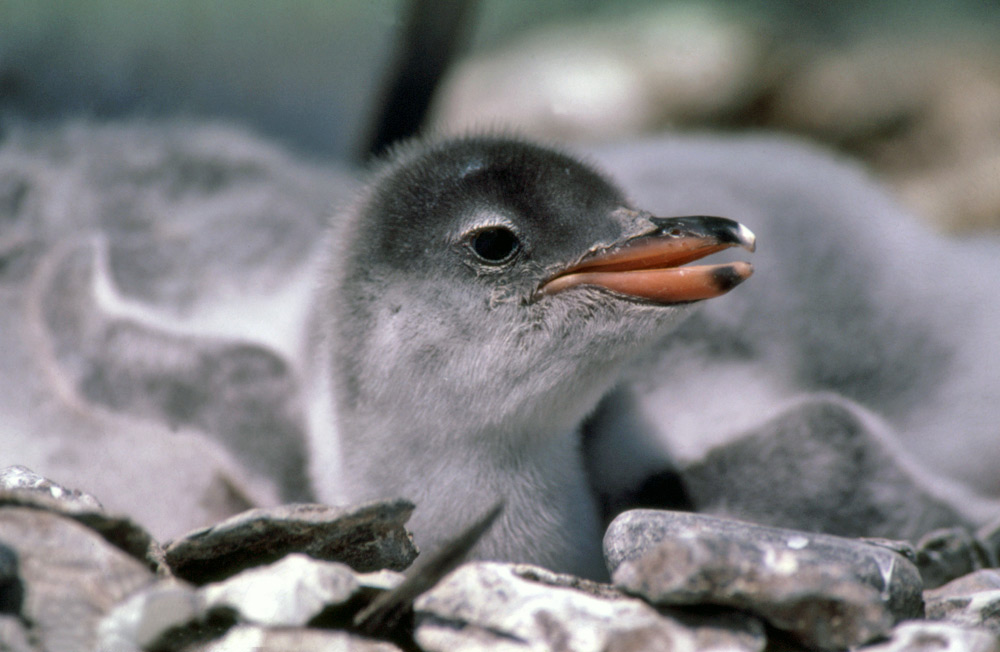
Placing the animals
in context, snow and ice in the wider picture helps too
Zoom lenses help you
get close-up shots from a distance
Sitting in one place
for a while means the animals regard you as part of the furniture
and act as if you're not there after a while
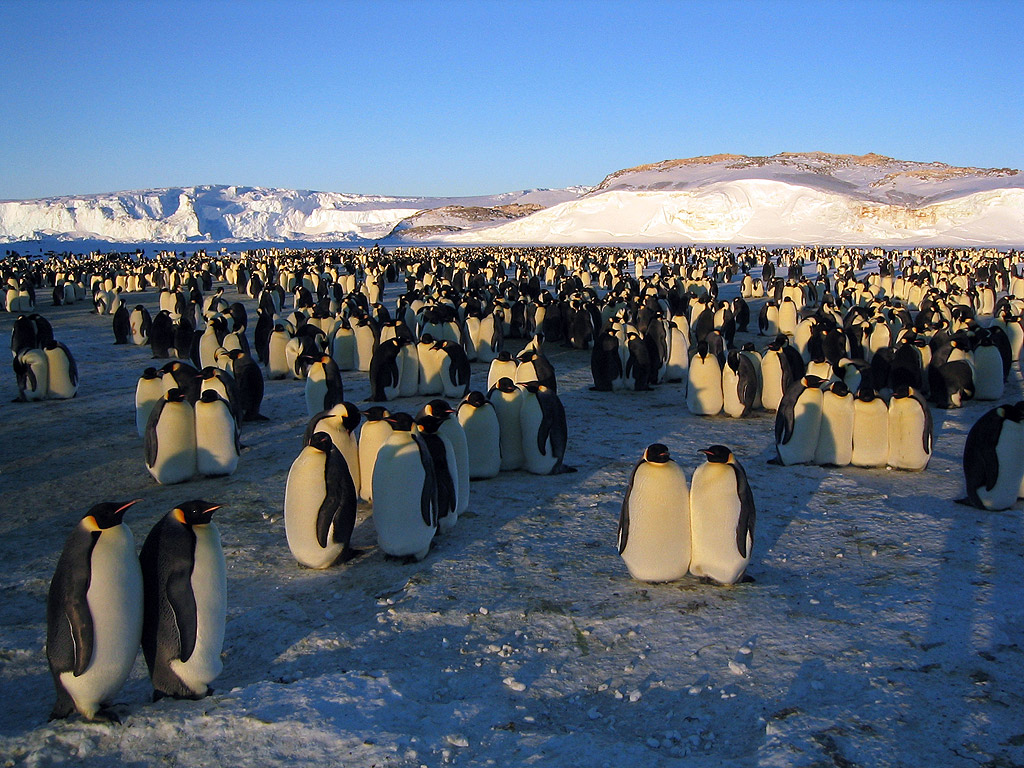
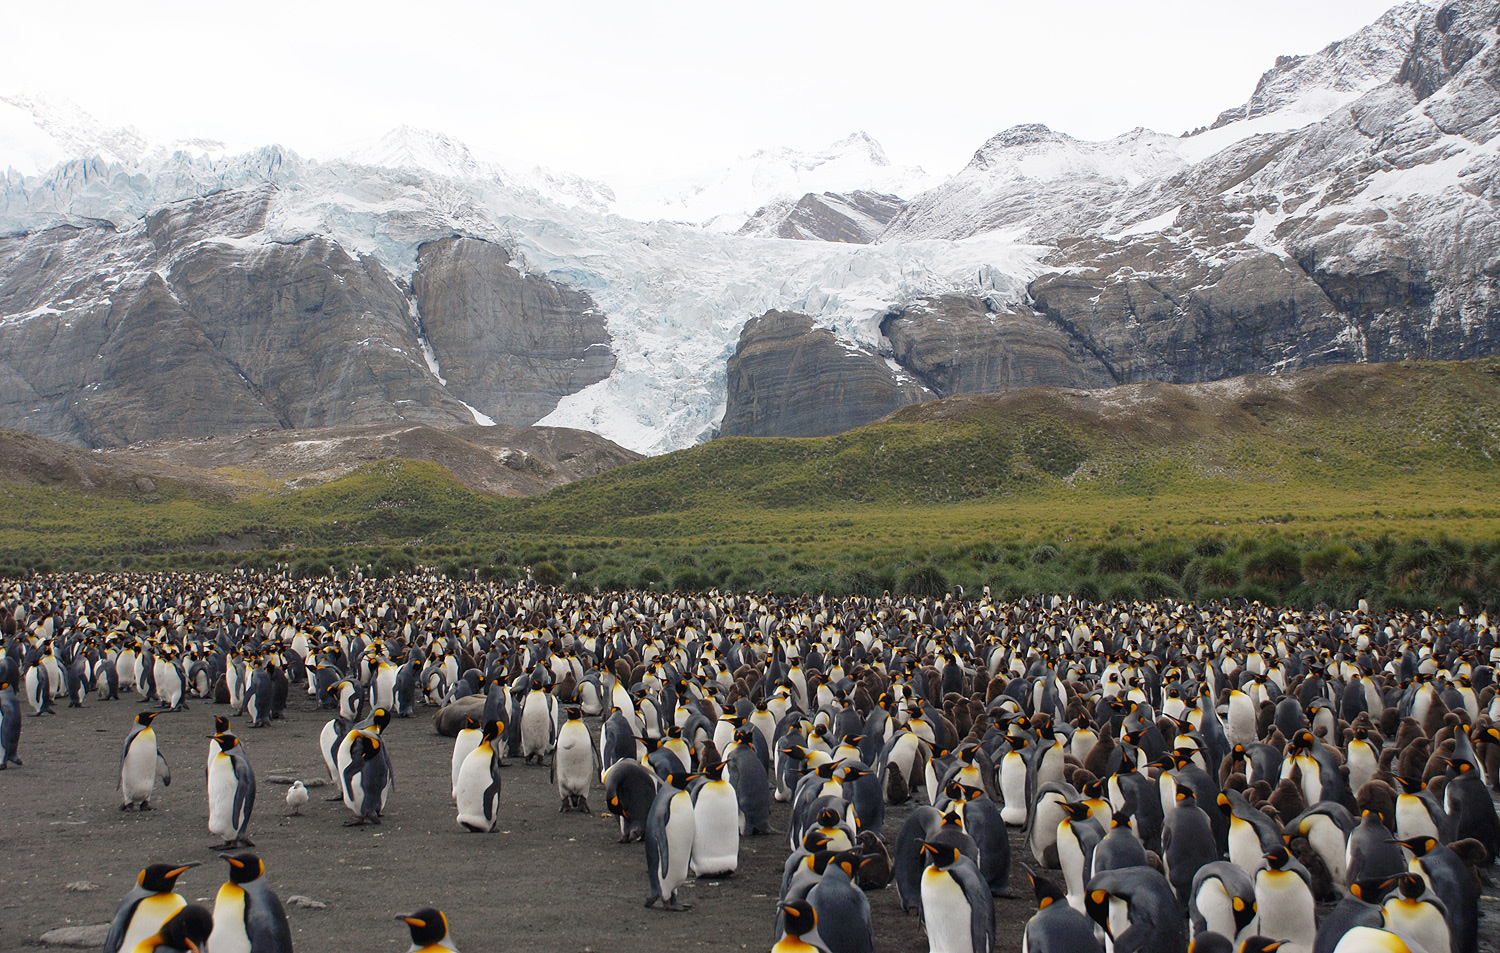
A slightly elevated
view with close (ish) penguins at the front with a view to the
larger group behind
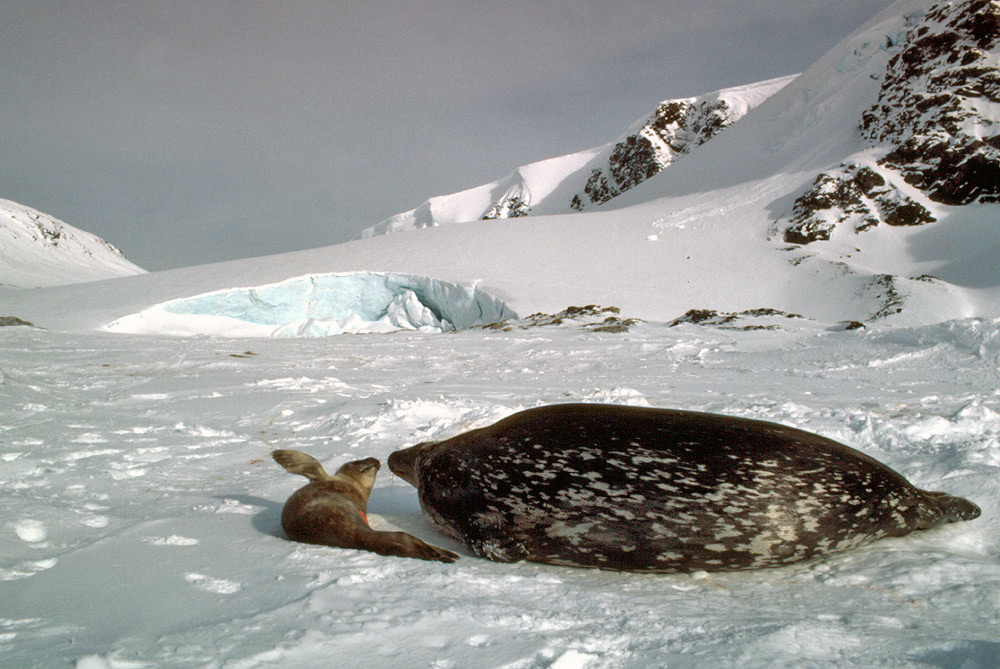
Weddell seals in environmental
context
Have your camera at
the ready to capture a fleeting event quickly
Photographing Snow and Ice - Exposure Tips
Modern cameras come with a built in exposure meter to measure the amount of light around and automatically apply the correct settings for a properly exposed picture. Most cameras will also tell you what these settings are in terms of the shutter speed and aperture, or "f-stop" and give you the option to adjust one or both of these settings.
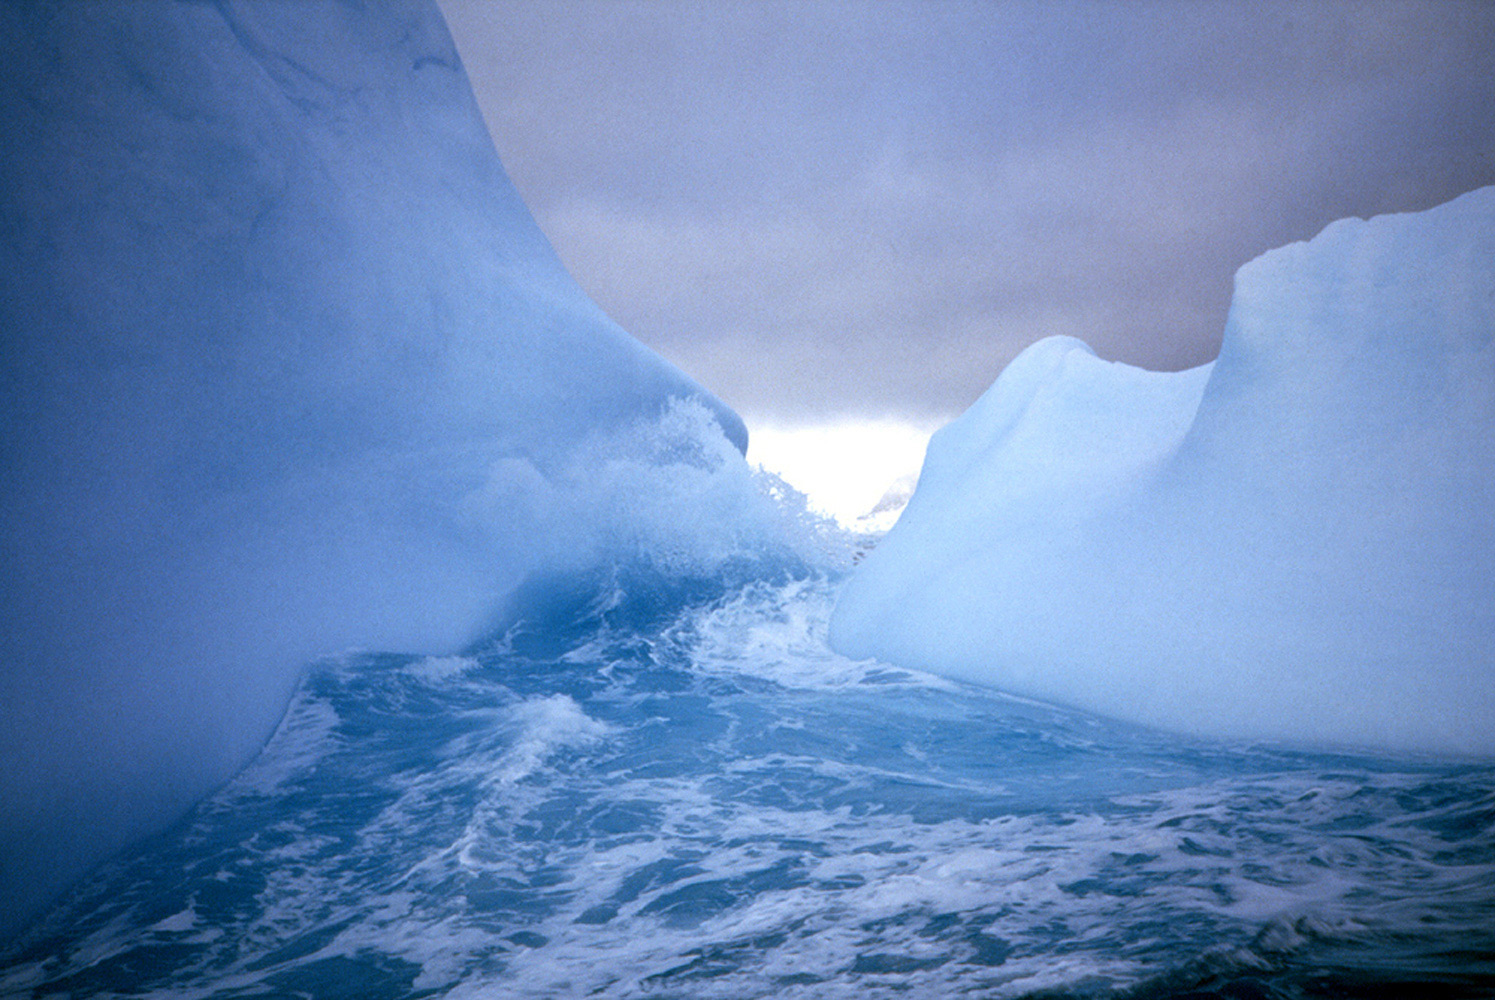
Light meters can have a problem when faced with large amounts of highly reflective snow and ice. The actual reading from the meter if used directly will give a too-dark exposure. When we see snow and ice, the scene is largely white, consisting of far more highlights than shadows so we frequently need to over-expose the scene, that is to give the image sensor more light than the light meter says that it needs with a slower shutter speed or wider aperture. This is best done by "bracketing" exposures, take one at what the light meter is telling you and then take another at one or two pictures giving more exposure than this.
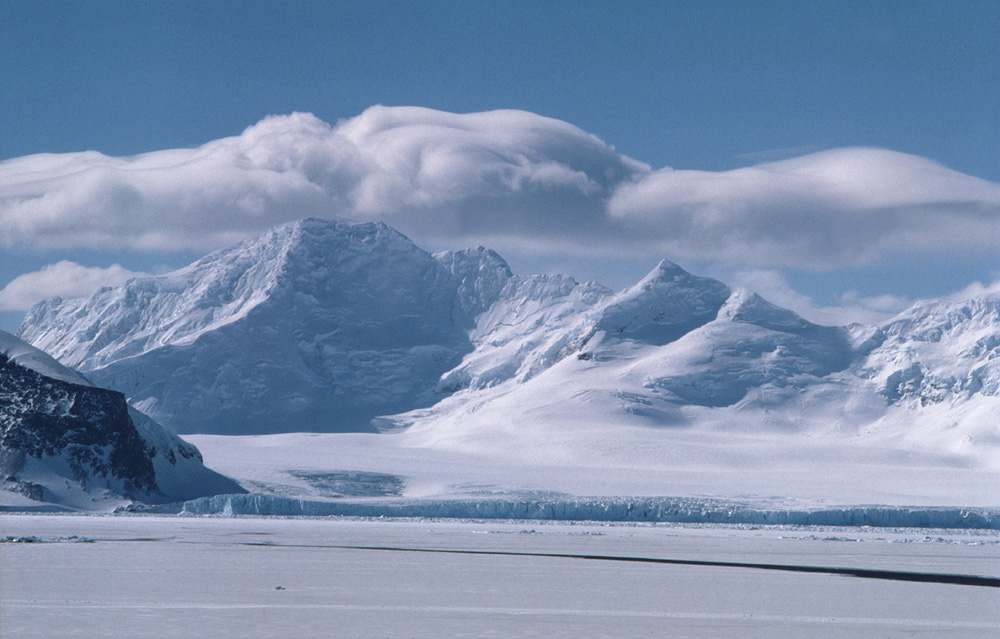
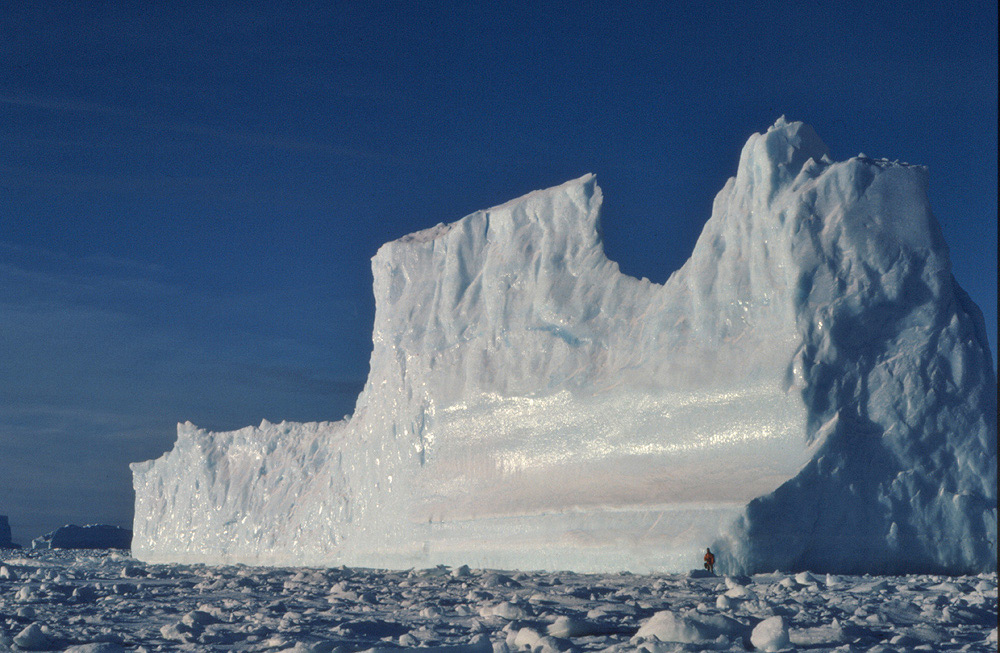
Subjects
like these icebergs will probably fool your light meter, so
take several pictures with different exposures
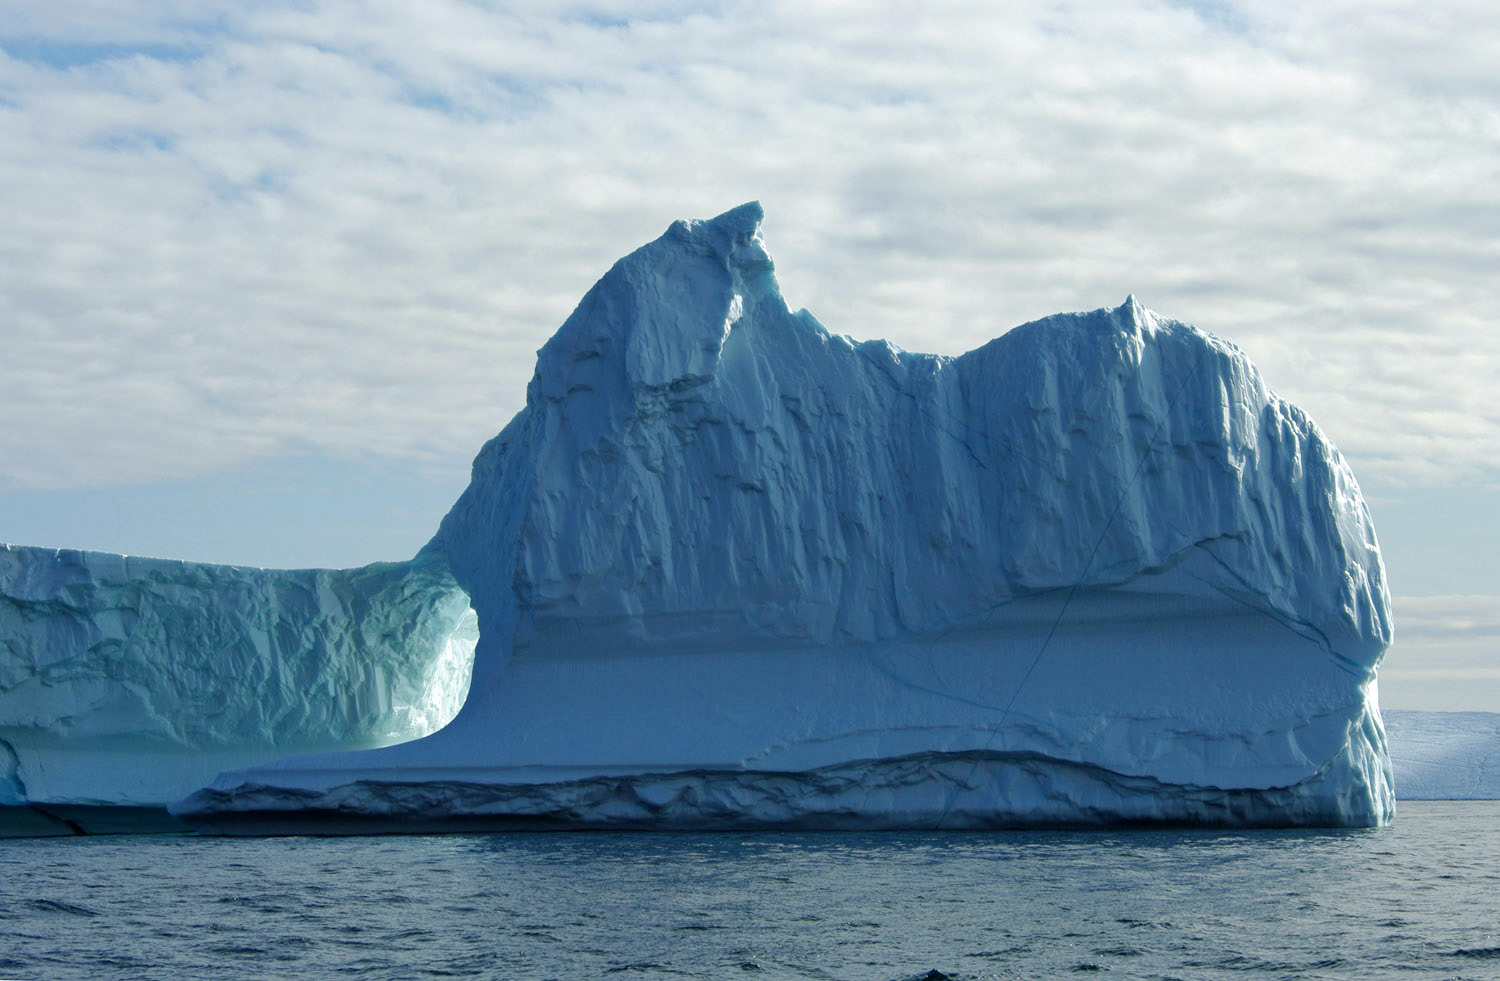
Sunlight on ice can
produce some interesting effects, again bracket exposures to
show the effect you want
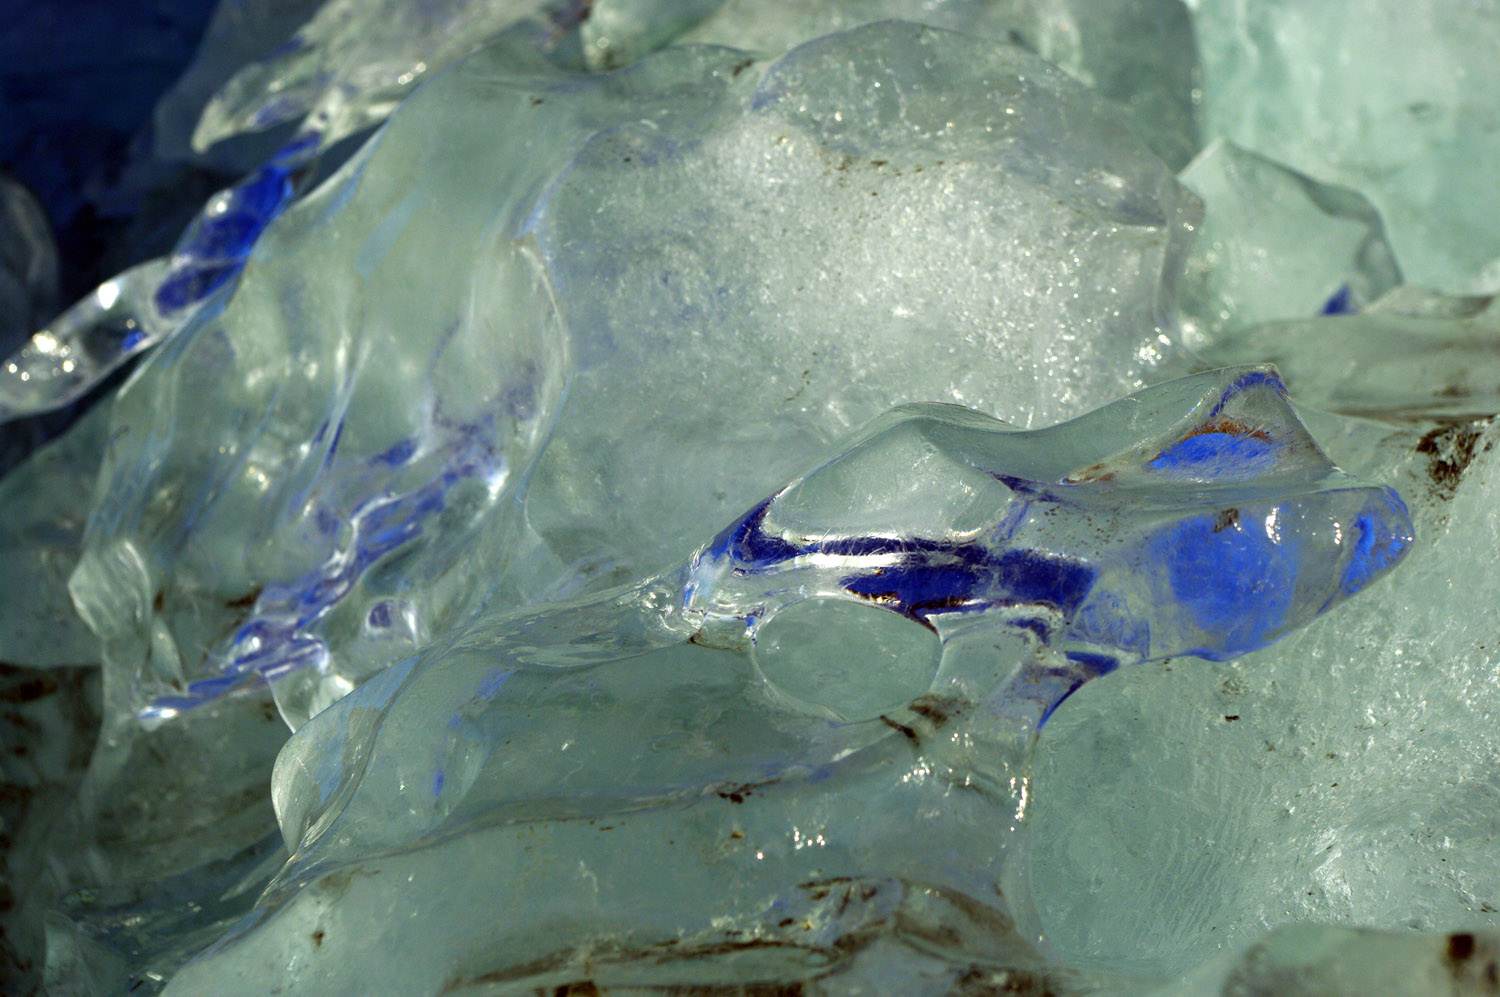
Ice close-ups can
provide some interesting pictures, move around to get the best
colors and effects
Many cameras have a button for exposure
compensation that looks like this
![]() to
allow you to still use the automatic exposure settings the camera
applies but to consistently apply a correction factor that you
set using this button to the automatically calculated exposure
levels. It may even be possible to set your camera to automatically
bracket exposures, so when you press the button it takes 3 or
5 pictures instead of just 1 at different exposures each side
of the average value.
to
allow you to still use the automatic exposure settings the camera
applies but to consistently apply a correction factor that you
set using this button to the automatically calculated exposure
levels. It may even be possible to set your camera to automatically
bracket exposures, so when you press the button it takes 3 or
5 pictures instead of just 1 at different exposures each side
of the average value.
More on exposure in digital cameras
The Decisive Moment
A phrase coined by the great French photographer Henri Cartier-Bresson sums up what makes a great photograph. In essence it is knowing exactly when to take the photograph. You have a found a good subject and are in the perfect position, but things are changing, one moment the picture would be ok, the next, when expressions have changed - truly memorable.
Cartier-Bresson mainly photographed people and so it is easy to see his point. The same principle applies to nearly all natural light photographs irrespective of subject. With wildlife the animal is almost constantly moving. Don't just point and shoot (this only makes for quick photos, not good photos). Set yourself up, sit and watch the subject through the lens, don't just click away hoping for the best, wait for the "decisive moment", if you miss it, wait, it may happen again.
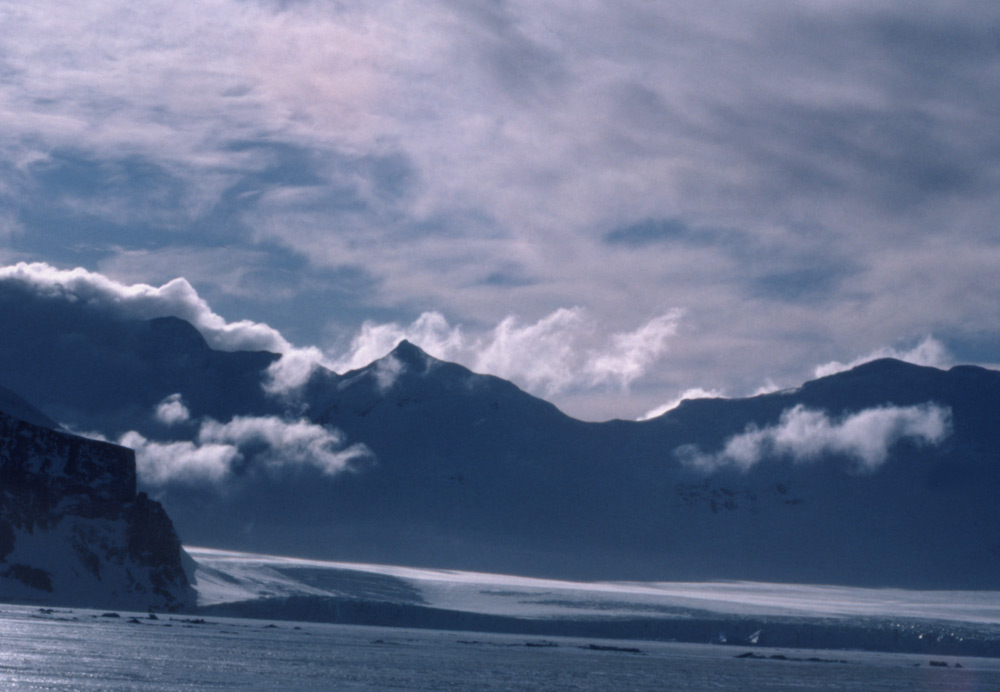
The same applies to landscapes, but this time it is the lighting that is changing. Antarctica is windy and so cloud is frequently blowing by making it sunny one minute, cloudy the next. Sunsets evolve, they build up and fade away. Waves wash over the bow of the ship or over the shallow reaches of an iceberg, whatever is happening will change the photograph. The legendary American nature photographer Ansel Adams would frequently wait for hours in one position, for the elements of sun, cloud and light to come together perfectly for the best possible picture.
"Point and Shoot" has become
the name of a category of camera, don't take it as an instruction
- it doesn't make for good photographs.
A picture taken when
the wash of the wave was highest
Watch the penguins
through the lens and wait to catch the best moment
The Ultimate Photographic Accessories
 I
don't like photographic gadgets and accessories are best
kept to the absolute minimum. However, there are two
accessories that are totally invaluable to the photographer
and most of us are fortunate enough to already have them in
full working order. They are your legs.
I
don't like photographic gadgets and accessories are best
kept to the absolute minimum. However, there are two
accessories that are totally invaluable to the photographer
and most of us are fortunate enough to already have them in
full working order. They are your legs.
I have seen so many people in Antarctica and elsewhere trying to take good photographs from where they happen to be standing at the time. It is unlikely that as you come across the best photographic opportunities you will automatically be in the best position.
A good photograph is knowing
where to stand
Ansel Adams
Think about framing, what is in the background? Do you really want a picture of that Gentoo penguin and chick with some tourists in bright coats behind it? You may have the most wonderful view of mountains and glacier from the ship, but do you want a radio mast towards the side of the shot? If you're photographing people do you really want to cut them off at the knees and have an expanse of sky above their heads?
Perhaps if you walked up the slope of the hill a little, you could avoid that dull expanse of featureless rock that takes up the bottom third of your picture of that dazzling iceberg off shore.
Get used to seeing everything through the lens as the finished picture and move yourself around to include or exclude elements of that picture for best effect.
Backgrounds and Sloping Horizons
Background - What is behind your subject? Does it add to the picture or does it distract. Out of focus ice and sea behind many Antarctic wildlife shots add atmosphere, bare rocks less so, so why not move position. Are there things in the background that you don't want? If you are taking a picture of a seal, don't have a mass of penguins behind, unless that is the photo you really want to take. Decide what your subject is and take a picture of that and only that.
Sloping horizons. Look at the horizon, it's level because we perceive it that way. Make sure any horizon in any photograph you take is horizontal, sloping drunken horizons are the tell-tale mark of a poor photographer.
You get a second chance at fixing this when you can edit in the "digital darkroom" using a programme such as Photoshop on your computer. It is still important to get it right at the taking stage as correcting the picture on your computer will result in having to cut something out of the picture that may have been better if it was in it.
Shutter Speed and Camera Shake
There is an old rule of thumb with 35mm film cameras that you can hand-hold the lens at a shutter speed of about the reciprocal of the focal length. In other words, a 50mm standard lens can be hand-held at 1/50th of a second a 135mm lens at 1/135th and so on. Digital cameras tend to have shorter focal lengths, so go one step further by doubling the lens length and you will be ok.
So for a 50mm lens (or zoom setting of 50mm) try not to go any slower than 1/100th of a second, for 100mm lens, 1/200th or faster. The difference in sharpness is marked and noticeable.
Camera shake is one of the easiest and most effective things that you can change to improve the technical quality of your pictures. If you carry around and use a tripod or monopod, then the results are even better, though this is a bit much for most people.
A cheap and easy alternative is a small bean bag, put it on a rock and press your camera against it when taking pictures. You won't use it for every shot, but for those that you do use it for you'll see a difference.
For hand-held shots, brace yourself before taking the picture, pull your elbows into your body and hold your breath just before squeezing (not jerking) the shutter. Leaning the side or corner of the camera against something solid can also work, though not on a ship as you can end up transferring the vibration from the engines to the camera.